Spot Bonding Failure with Stone Veneer
When you’re in the natural stone veneer industry one of the worst calls you can get from a client is the one telling you that your stone is falling off their walls. There’s a myriad of reasons why, from the wrong substrate was used or an incorrect setting material – we’ve even seen a project where the installer set the stone when it was below freezing causing the thinset to freeze and never cure. Photos are always a great way to reveal the problem, so when we heard from a client recently about some of our Planc Large Format Tile falling off an exterior feature wall installation the first thing we asked for was photos of what was happening.

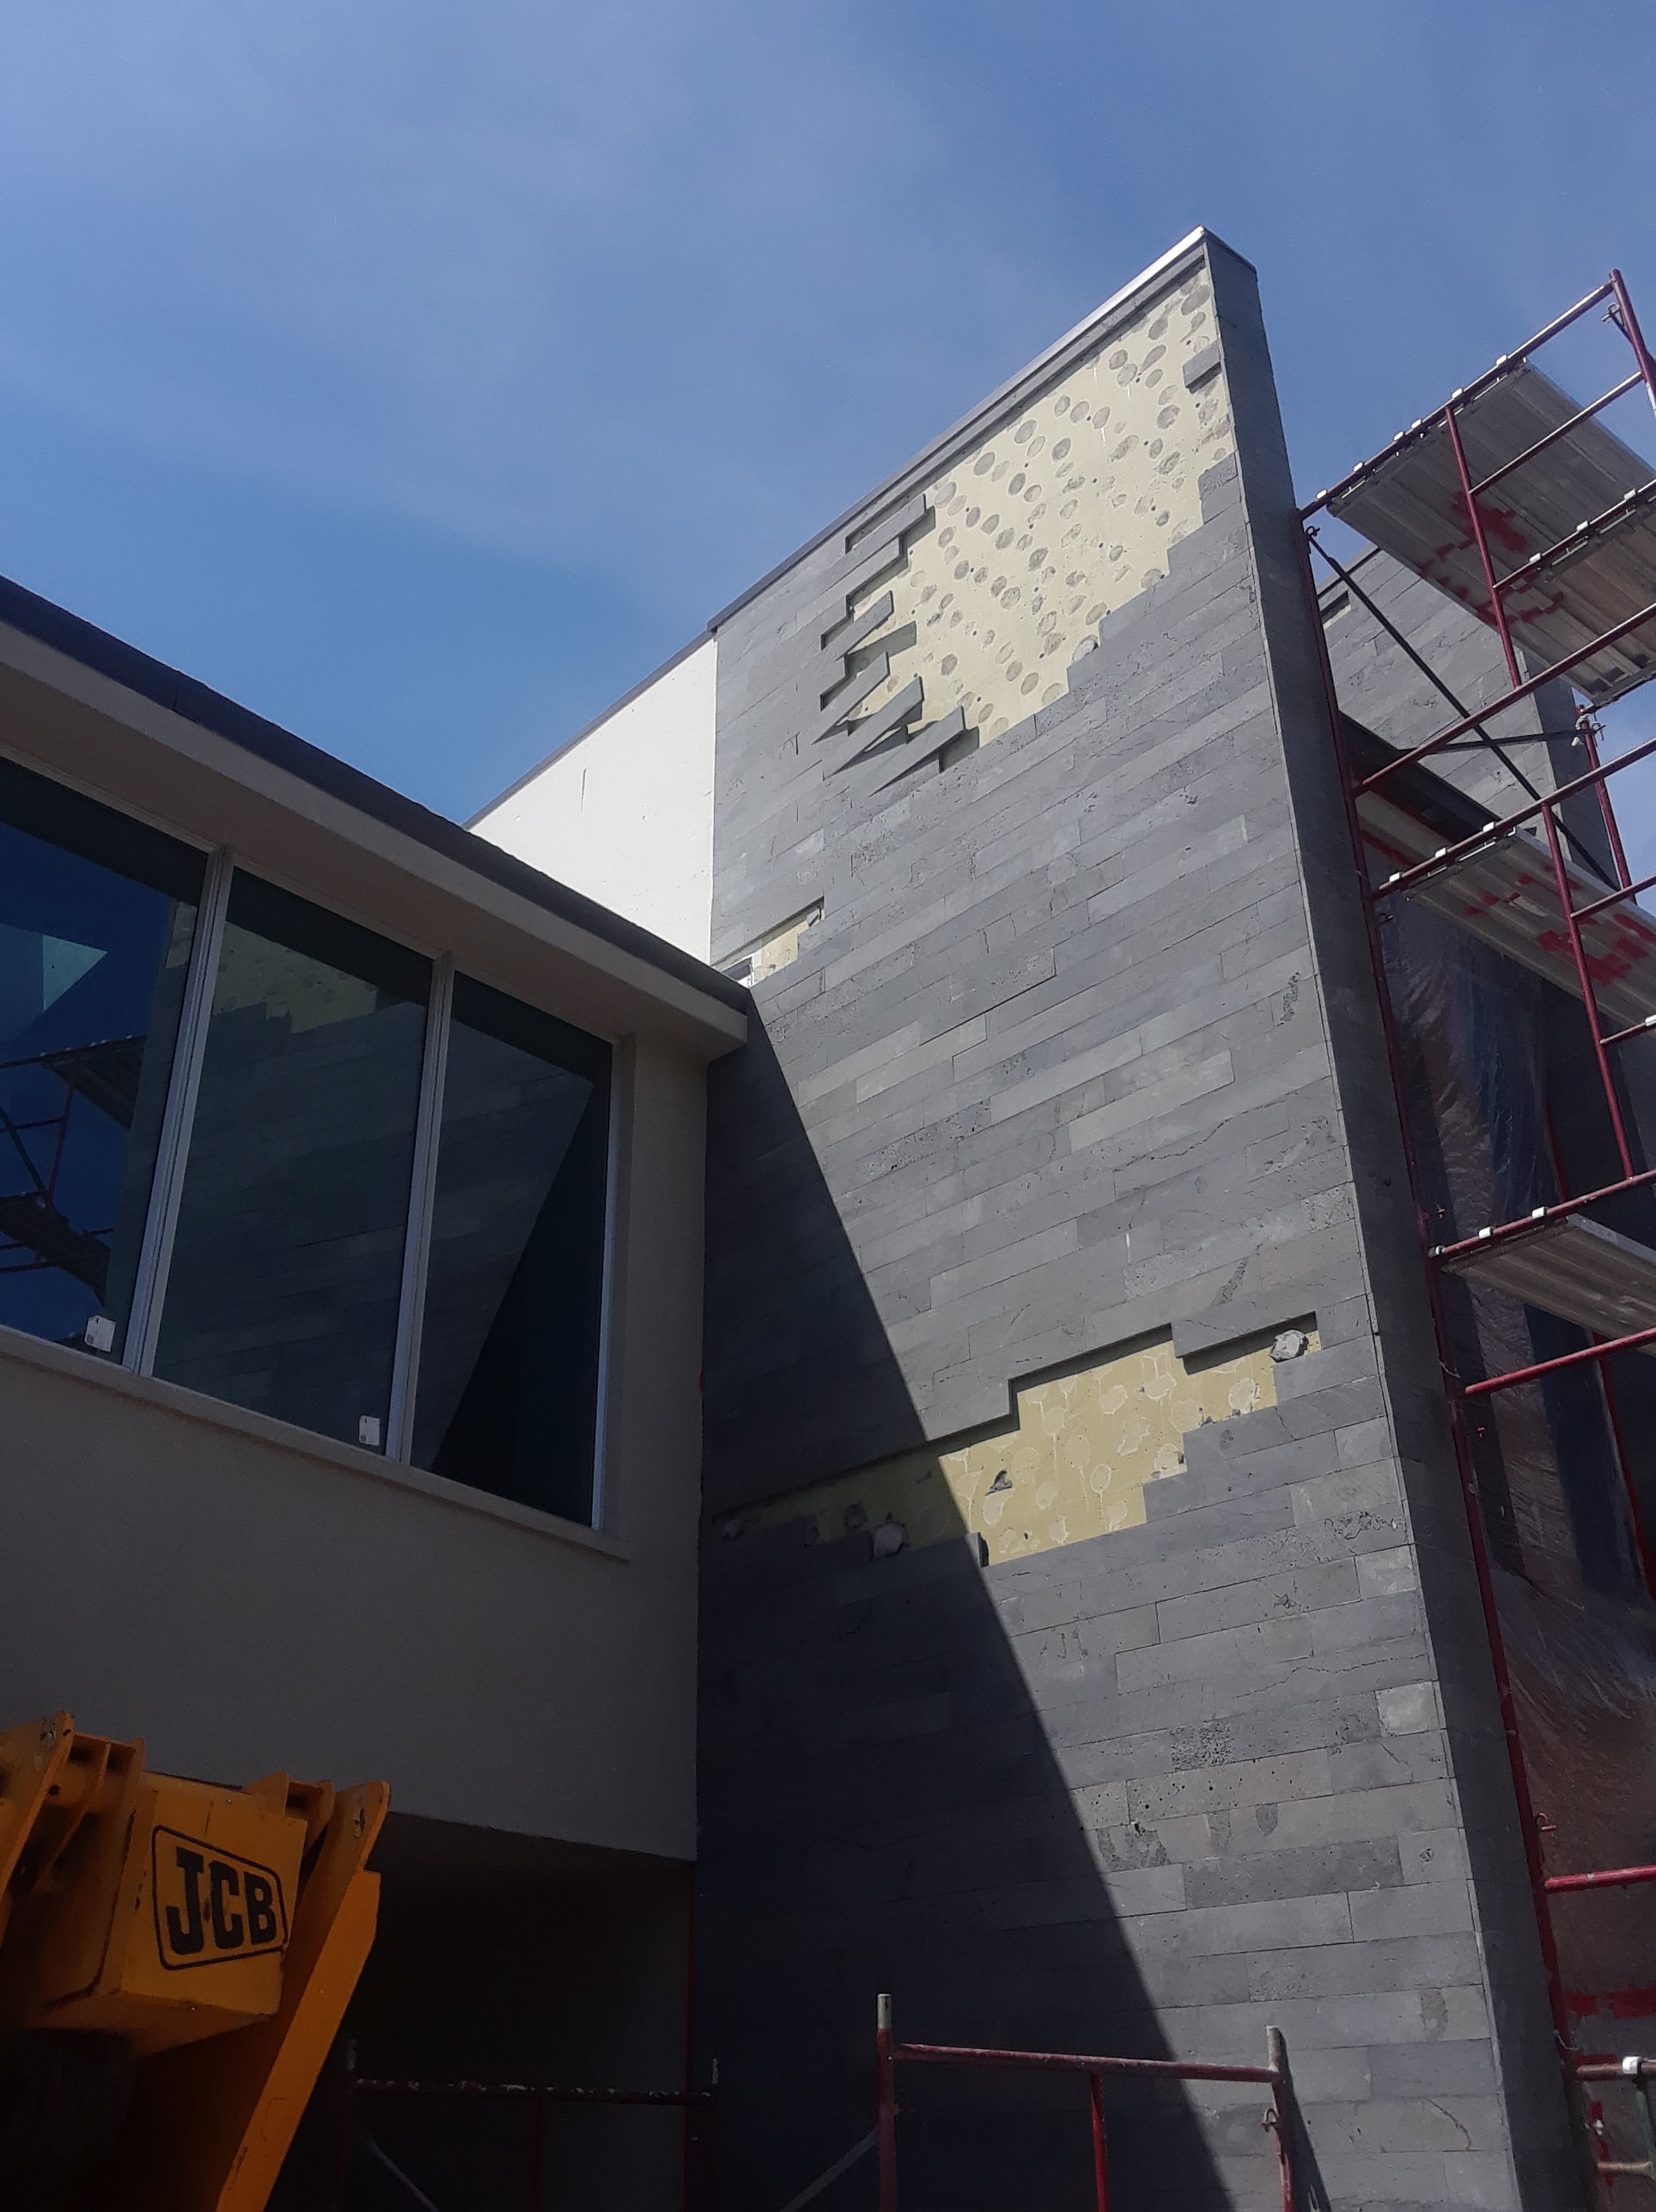
The old saying is definitely true that a photo is worth a thousand words, but when we got photos of the failing installation from the client we only needed two words to explain what the problem was – spot bonding.
Spot Bonding is basically where the installer uses their trowel to put a couple dollops of thinset onto each tile, sticks it on the wall, and moves onto the next one. Ultimately, spot bonding is mainly a time saving technique because its much faster than ensuring full coverage of the setting material across the back of the tile, and it also saves a little money since not as much thinset is going to be used. Most installers recognize the importance of having full coverage of the thinset across the back of the tile, especially on floor installations where any voids between the tile and the subfloor can result in a cracked tile. Some installers make the incorrect assumption that since there’s not going to be a weight load on a wall tile that full coverage on the back of a wall tile or stone veneer isn’t necessary, and while they are correct that it’s very unlikely that a wall tile is going to crack, they are forgetting about that ever so important force called gravity. Without adequate coverage on the back of a wall tile or stone veneer the weight of the tile or veneer might prove to be too heavy, give way, and fall of the wall.

As you can see in the photos of the installation that failed, the distinctive circular smudges in the ares where the stone veneer has fallen off the wall are the tell tale sign that the stone was put up using spot bonding. The correct way to install wall tile or stone veneer is to ensure full coverage of the thinset on the back of the stone. The way we recommend doing this is to first trowel up thinset onto the substrate and then for most of our stone veneer products, notching the thinset with a 1/2” square notch trowel to create a setting bed suitable for large format heavy tile and stone products. Next, we recommend a quick back butter of each tile before it goes up on the wall. Finally, check for coverage every so often by pulling a tile you just set off the wall and looking at the back to see if thinset is everywhere or if there are any gaps. The Tile Council of North America (TCNA), the governing body for our industry in the U.S., recommends 95% coverage across the back of each tile.
It’s not only tough to see these photos and the product get used incorrectly, but with knowledge of a spot bonded installation, particularly of a heavy tile or stone veneer product, also comes the responsibility to recommend that the installation be taken down and re-installed using proper setting techniques. A spot bonded installation is absolutely a liability and can cause severe property damage and personal injury.
An easy way to avoid ever having to deal with a tile or stone installation that might fail due to spot bonding, or a wide variety of other reasons, is to use a TCNA certified tile installer. The TCNA certification ensures that installer has knowledge of the best practices for installing tile and stone. The manufacturer of the tile or stone is also a great resource, especially if its a DIY project. A detailed installation guide is worth a read even if you’re not the one doing the installation just to be familiar with what should be happening and to make sure that it does.
If you’ve purchased Norstone products and worked with an installer that you either know or think might have spot bonded the installation contact us today to chat with one of our technical experts about how to check and discuss next steps.
.png)


